Whilst there are many popular CMS platforms (such as WordPress and Magento), none have seen the recent rise in popularity that Shopify has. With this in mind, we thought it would be the ideal time to put together a Shopify SEO checklist of common SEO issues you might come across with your website and how to fix them.
Shopify by default is setup in a way which could cause some serious issues for your SEO if not fixed. You might ask: if it’s not built with SEO in mind, then what’s the point in using Shopify?
Well, what’s drawing a lot of customers to Shopify is the simplicity and speed of setting up an ecommerce store, compared to the likes of WordPress or Magento.
Below you will find some common problems with how Shopify is setup that are usually straightforward to fix with other platforms, and how to resolve them.
Contents
- Step 1. Change default Shopify domain name to a custom URL
- Step 2: Change Shopify product URL structure & product internal links
- Step 3: Add canonical tag in Shopify to duplicate content
- Step 4: Ditch short blog tag and product tag pages
- Step 5: Noindex the Shopify default collection pages
- Step 6: Change the Shopify H1 tags around your logo
- Step 7. Improving Shopify site speed
- Step 8. Blocking search engines from crawling using the robots.txt file
- Step 9: How to create a Shopify redirect
- Step 10: Check server log files
Step 1. Change default Shopify domain name to a custom URL
When you first setup a Shopify website you will get a default MyShopify domain, which will look something like:
https://your-store-name.myshopify.com
It’s fine to use this, however it’s best to use a custom domain which better represents your website. To do so, Shopify have a useful guide here on how to add a custom domain.
One thing you want to make sure of is that your new custom domain is set as the primary domain and that the default your-store-name.myshopify.com domain is set to redirect to the primary domain. This again can be done in: Settings -> Domains
To check if you have any pages indexed on the default domain, head to Google and type in:
site:your-store-name.myshopify.com
As you can see below, there are a lot of webmasters who have not don’t this and meant their myshopify.com domain is indexed:

Step 2: Change Shopify product URL structure & product internal links
By default, Shopify has a strange setup for product URLs, whilst the standard structure is:
/products/product-name
If you access a product from a category page (Shopify calls them collections) the product URL structure looks something like this:
/collections/category-name/products/product-name
The collection version of the product URL does have a canonical tag back to the /products/product-name version, but this is bad for two reasons:
- Canonicals are only a recommendation as to what search engines should index, so Google could still decide to index the collection versions or even both.
- All internal links to products are canonicalised URLs which could be a waste of crawl budget.
So, how do we fix it?
You need to edit a specific theme file, located here:
Online Store -> Themes -> Live Theme -> Actions -> Edit Code -> Snippets -> product-grid-item.liquid
If you can’t find this theme file, have a search through the other files related to products within the snippets folder.
Find this bit of code:
href="{{ product.url | within: collection }}"
And update it to:
href="{{ product.url }}"
That’s it! Have a quick scan to make sure there aren’t any other mentions of the same code, but this should do the trick.
This could cause some issues with the breadcrumbs, so make sure that all links within the breadcrumbs are working after this change.
Step 3: Add canonical tag in Shopify to duplicate content
To add a canonical tag to a Shopify page, you first need to access the code for your theme. To do this, log in to your Shopify account and go to the “Themes” section of your admin panel. From there, click on the “Actions” drop-down menu for the theme you want to edit and select “Edit code.”
Once you’re in the code editor, look for the file that corresponds to the page you want to add the canonical tag to. This is usually the “page.liquid” file, but it could also be a specific template file for a particular page, such as “collection.liquid” or “product.liquid”.
In the code for the page, find the section where thetag is located. This is where you will add the canonical tag. The tag should look something like this: . Be sure to replace https://www.example.com/page-name with the actual URL of the page you want to add the canonical tag to.
Once you’ve added the canonical tag, save your changes and refresh the page to see the tag in action. This will help search engines understand which page is the “canonical” or primary version of the page, and will prevent them from indexing duplicate content.
Step 4: Ditch short blog tag and product tag pages
Another potential issue with thin content is blog tag pages. These are very similar to the product tag functionality and usually have a URL structure of:
/blogs/news/tagged/tag-name
Again, these might have already been indexed so to check, head back to Google and type the following:
site:websitename.co.uk inurl:tagged
Following the same fix as the product tag pages, add the following bit of code to the liquid file:
{% if current_tags %}

<meta name="robots" content="noindex, follow">

{% endif %}
Step 5: Noindex the Shopify default collection pages
Shopify also creates some other default pages within the collections section which you have no control over.
/collections – This is a list of all the collections on your website
/collections/all – This is a list of all the products on your website
/collections/new – This is a list of all new products added to your website
These pages have little to no value to users or search engines, so again we can add a bit of code to the theme.liquid file to add a noindex,follow meta robots tag and remove those from Google’s index:
{% if (template contains "collection" and collection.handle == "all") or (template contains "collection" and collection.handle == "new") or (canonical_url == "https://websitename.co.uk/collections") %}

<meta name="robots" content="noindex, follow">

{% endif %}
Step 6: Change the Shopify H1 tags around your logo
Another common issue with Shopify sites is that Shopify decides to wrap the logo within a H1 tag. This isn’t ideal as you would then have multiple H1 tags on each page.
In most cases, it might just be the homepage that has a H1 around the logo, but it’s worth fixing anyway.
To find the code, you’ll want to go to:
Online Store -> Themes -> Live Theme -> Actions -> Edit Code -> Sections -> header.liquid
And find the following code:
{% if request.page_type == 'index' %}

<h1 class="h2 site-header__logo">

{% else %}

<div class="h2 site-header__logo">

{% endif %}
And also:
{% if request.page_type == 'index' %}

</h1>

{% else %}

</div>

{% endif %}
For both bits of code, replace the h1 with div and finally click save.
Step 7. Improving Shopify site speed
It’s important to make sure that your website loads fast, for both usability and ranking purposes. Some things Shopify does well regarding speed are fast hosting (you don’t have to host your own Shopify store), browser caching and using a CDN. These three things are done by default. So, what can you improve?
a) WebP images
WebP images are a modern image format that has better compression than other formats just as JPGs or PNGs. With other platforms such as WordPress, it’s likely you would need to install a plugin to convert images to WebP.
So how do you do this with Shopify? Well, as of 2019 Shopify automatically converts your images and loads the WebP version without you having to do anything! If you want to check and make sure, simply inspect the page in Chrome, go to the network tab, refresh the page and you should be able to see that images are loaded as WebP in the type column.
b) Image compression
This isn’t something that Shopify does by default, however, similar to WordPress where you can install a plugin, Shopify has apps that you can install to help compress your images.
A couple of the best rated image compression plugins are LoyaltyHarbour Image Optimizer and Crush.pics SEO Image Optimizer. Both apps have free plans available but are as little as 4.99 a month for 1,000 images / 500mb of images per month.
c) Correct sized images
Another great feature of Shopify is that images (for the most part) are automatically resized to fit different screen sizes. This is useful for page speed as you won’t be loading a 2000px image on a 400px mobile device.
Shopify has a maximum image size you can upload though, which is 4472 x 4472px or 20MB. They do recommend that product images shouldn’t exceed 2048 x 2048px.
d) Lazy-loading images
Lazy-loading resources is a great way to improve the initial load of a page, here is Google’s definition of what lazy-loading is:
“Lazy-loading is a technique that defers loading of non-critical resources at page load time. Instead, these non-critical resources are loaded at the moment of need. Where images are concerned, “non-critical” is often synonymous with “off-screen”.”
Source: https://web.dev/lazy-loading/
Essentially, it delays the loading of a resource such as an image until you get to the point of the page where that image is shown. So how do we do this with Shopify?
Firstly, check to see if the theme you are using automatically has lazy-loading, or if you are still deciding on a theme to use, you could look for one which has lazy-loading included. If your theme doesn’t do this, keep on reading.
You want to go to this theme file:
Online Store -> Themes -> Live Theme -> Actions -> Edit Code -> Layout -> theme.liquid
Paste the following code before the </head> tag:
{{'//cdnjs.cloudflare.com/ajax/libs/jquery.lazyload/1.9.1/jquery.lazyload.min.js' | script_tag }}
Click save and this will implement lazy-loading across your website. If, however you don’t want to load another third-party script across your website, there are other ways to implement lazy-loading, just a slightly longer process.
1. Download the latest lazysizes script
2. Install that file here: Online Store -> Themes -> Live Theme -> Actions -> Edit Code -> Assets -> Add a new asset
3. Call the file “lazysizes.min.js”
4. Next go to: Online Store -> Themes -> Live Theme -> Actions -> Edit Code -> Layout -> theme.liquid
5. Add the following code within the <head> section: {{ “lazysizes.min.js” | asset_url | script_tag }}
6. Finally, you want to replace all your img tags from:
<img src=”image.jpg”>
To this format:
<img data-src=”image.jpg” class=”lazyload”>
e) How to minify CSS & JS files on Shopfiy
Similar to compressing your images, minifying your CSS and JS files helps to reduce the file size, which in turn helps to load the page faster.
Anything within your assets folder named as something like filename.scss.liquid is already minified, anything which is named filename.css can be minified.
But as of May 2021 Shopify minifies your themes theme.css file automatically, so it’s only if you have any other CSS files that you can look to minify using these steps.
Let’s say you have a file called custom.css within your assets folder:
1. Edit and rename the file custom.scss.liquid
2. Then find where that code is being loaded from, usually within the theme.liquid file.
3. Edit the file name from custom.css to custom.scss.css
Shopify will now automatically minify that file when it’s loaded!
Unfortunately, Shopify doesn’t do the same for JS files, so you would either need to minify the JS file manually using an online tool such as JSCompress or finding another Shopify app such as Swift – Page Speed Optimizer
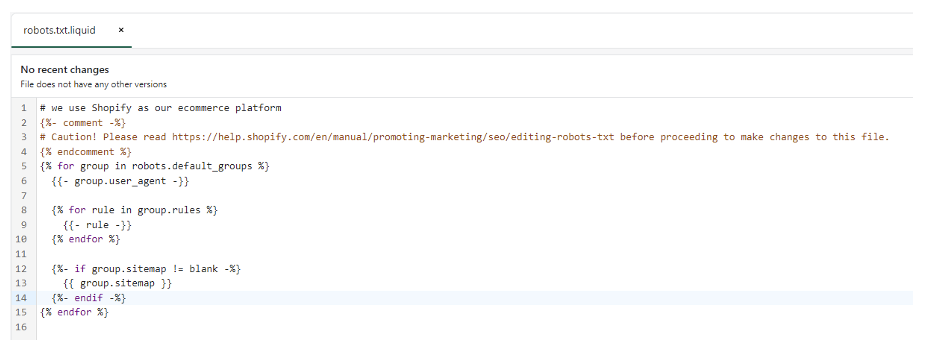
Step 8. Blocking search engines from crawling using the robots.txt file
Up until June 2021 you couldn’t edit the robots.txt file, which for other platforms like WordPress and Magento, is something you have full control over.
You can now add to the default robots.txt file that Shopify uses by going to:
Online Store -> Themes -> Live Theme -> Actions -> Edit Code -> Templates -> Add a new template
Select robots.txt from the dropdown list and click Done:

This will generate a file which looks like:
If for example, you wanted to block search engines from crawling the /collections/all page we discussed previously, you would want to update the code so it looked something like this:
{% for rule in group.rules %}

{{- rule -}}

{% endfor %}

{%- if group.user_agent.value == '*' -%}

{{ 'Disallow: /collections/all*' }}

{%- endif -%}

{%- if group.sitemap != blank -%}

{{ group.sitemap }}

{%- endif -%}
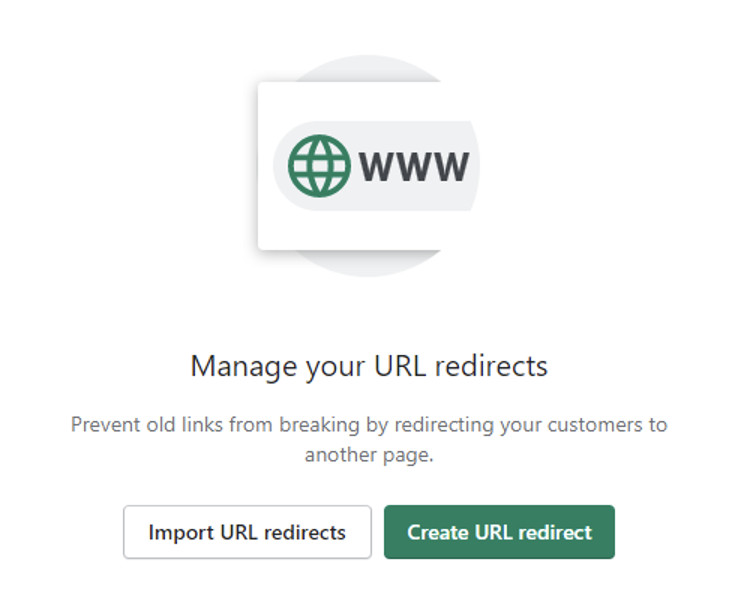
Step 9: How to create a Shopify redirect
Redirecting broken pages to a more suitable page is great for usability. For other platforms this is easy to do by using a plugin or editing the .htaccess file. Shopify have also made it simple to add redirects. To do so, go to:
Online Store -> Navigation -> View URL redirects

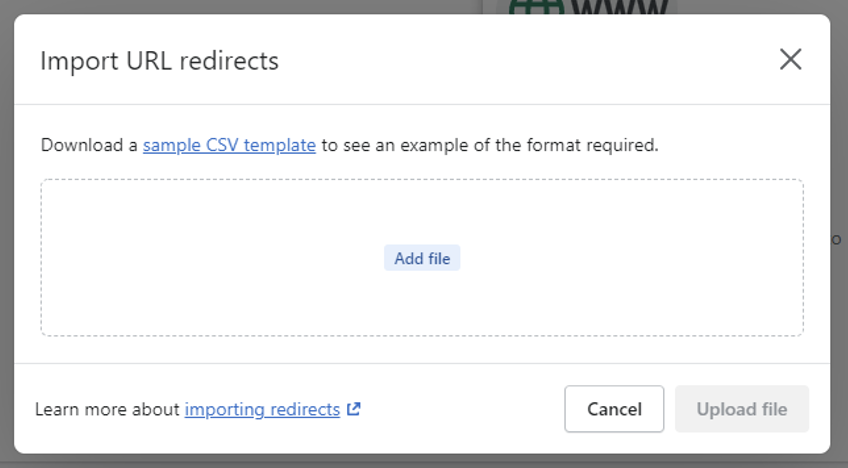
From here you can either add redirects one by one, clicking the Create URL redirect button, or if you have quite a lot to implement, you can import a redirect file using the Import URL redirects button.
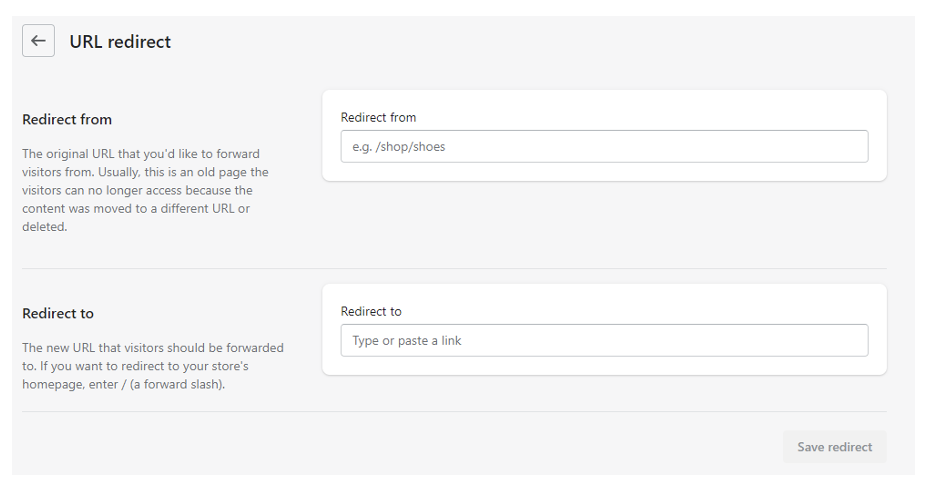
If you’re doing a single redirect, simply add the URL you want to redirect and where you want to redirect to:
If you’re importing them in bulk, make sure to download Shopify’s CSV template so that your redirects are in the correct format:
Step 10: Check server log files
Server logs are a great way of finding out what bots are crawling on your website. This is useful to find pages that aren’t being crawled that often or pages that no longer exist which are being crawled repeatedly. This gives you options for looking at adding redirects or blocks in the robots.txt file.
The bad news, because Shopify hosts everything, there is no way of accessing the server logs for your website.
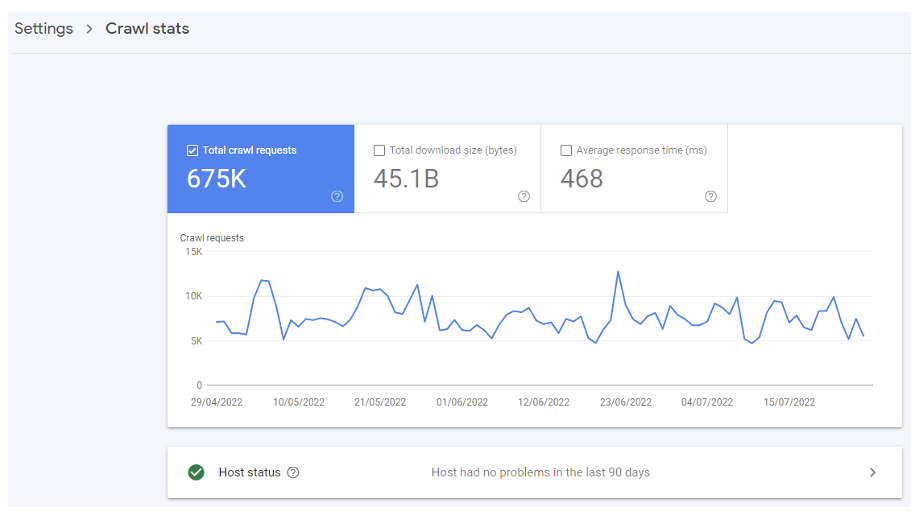
The good news, you can view a limited amount of how Google crawls your website through Google Search Console.
Once you have Search Console setup and data has been running for a few weeks, you’ll want to navigate to:
Settings -> Crawling -> Crawl Stats
Here you will get access to data for the last 3 months:
You can then look at crawls by response code, file type or even by which Googlebot.
Hopefully this checklist helps you resolve some of the most common Shopify issues, however, there’s much more to Shopify SEO in order to rank highly in search results. If you need help with your businesses Shopify store then get in touch!